
Does Positioning Matter?
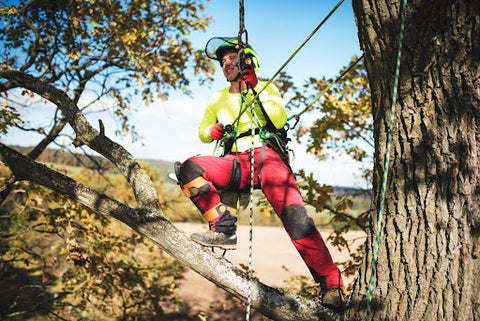
Positioning is just as important as having proper footwear for a comfortable five-mile run. Having proper positioning makes our job safer by keeping us in a proper stance, which helps reduce the amount of stress we put on our body.
I know those aches all too well! One of the things I really makes me chuckle is thinking back to all those times to where I would put too much stress on one leg because I was relying on the limb to support me, instead of my rope. This would make me look like I was doing the stanky leg up in the canopy!!
Turns out this was due to my positioning. We’ve all heard that infamous saying: “sometimes you have to learn the hard way,” am I right? Believe me when I say I learned the hard way and not because I didn’t have a teacher, but because I was young, stubborn, and thought I knew it all. (Sound like anyone on your crew?)
Proper Positioning
In order to obtain proper positioning, a few things are required which can include a good high central tie-in, proper rope angle, and a solid work positioning lanyard, which at times gets overlooked. We’re going to break down a couple different lanyard styles in this blog that have been proven to be some of the most effective.
Never forget the classics! Traditional lanyards come in 3-strand ropes that were either a two-in-one style or a simple single configuration. This style lanyard also comes with aluminum or steel snaps onto the ends, which were great for whipping it around the spar but don’t catch it with your teeth or that dental bill can get hefty! These, for most people, were typically the first lanyard that they used and well that’s because 9 times out of 10 it was standard company issue. You know what, they worked and got the job done! Just don’t get sap on it or that big old six coil prussik was going to be a nightmare to adjust! It’s weird though because even though the six coil gets tough to work, I still know a good amount of climbers that prefer these for pines.

Flip it!!! Wire core lanyards, or better known as fliplines, are a proven success with Spruces, Pines or whenever working a spar that requires a lot of flipping up and down. Due the wire core inside it is strongly implied that these don’t get used when working around electrical conductors. Just because these lanyards have a wire core and are slightly a bit more resistant to knicks or cuts, it doesn’t mean they are completely cut proof. Care should always be used when working with saws aloft. A super legit flipline option that we do carry would have to be Climb Right’s lanyard kit. It comes pre-assembled with its own carabiner, rope grab and swivel snap on the end! If you’re looking for rigidity, then look no further.

Hybrid lanyards…have you tried one yet?!!? One thing that made climbing a bit easier and way more creative for me has to be the use of my hybrid style lanyard! I run a 16 ft. lanyard that, when needed, has the potential to double over as a mini M.R.S. or even an S.R.S. system in order to get into a better position. Creating a hybrid lanyard isn’t too difficult at all; first thing you’ll need will be a rope lanyard of your desired length, preferably one with either spliced or sewn eyes. This simplifies and makes the lanyard less bulky at the ends. Second, would be to add at least two or three carabiners, or a snap if you like the snap action. Third step would be to get a prussik cord along with a pinto pulley or a hitch climber pulley; these help create your rope grab. Once these items are tied together…BAM! You got yourself a hybrid lanyard! If you want to avoid the stress of picking individual items, the purchase of a Lanyard Climbing Kit makes it a heck of a lot easier.
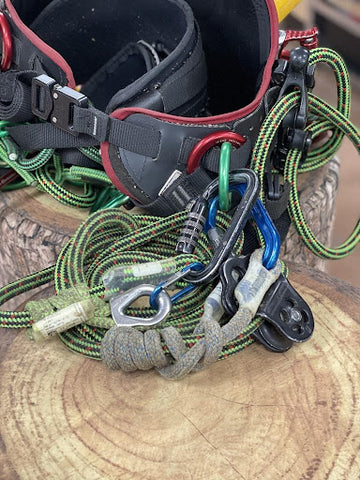
Wait a minute, how do you make that lanyard a mini climbing system? To convert your lanyard into an M.R.S system, switch the lanyard from the hip over to center D ring of the harness, throw working end over the desired limb and reconnect to the bottom becket of the Pinto Pulley; or, if you’re using a hitch climber, then connect to the front becket. To create an S.R.S lanyard configuration and achieve max length, the use of a thimble loop is required to simplify the setup process. Follow the same steps as you would to create the M.R.S. system. Now bear with me here, this is where things get different. Having attached the thimble loop onto the lanyard already, place that thimble on one side of the limb; pass the working end of the lanyard over the limb. Instead of reconnecting to the becket of the pulley, connect the carabiner to the thimble loop. Make sure the thimble is placed a few inches under the limb so that the carabiner does not side load. This is a method I use on a regular basis when I’m out chasing deadwood on White Oaks with that beautiful widespread. Talk about limb walking for days!
What is your go to lanyard system that you rock on a daily basis? Let us know what you think on the talked about lanyards and if you think they are as important as I think. We can’t wait to hear from you!
Leave a comment